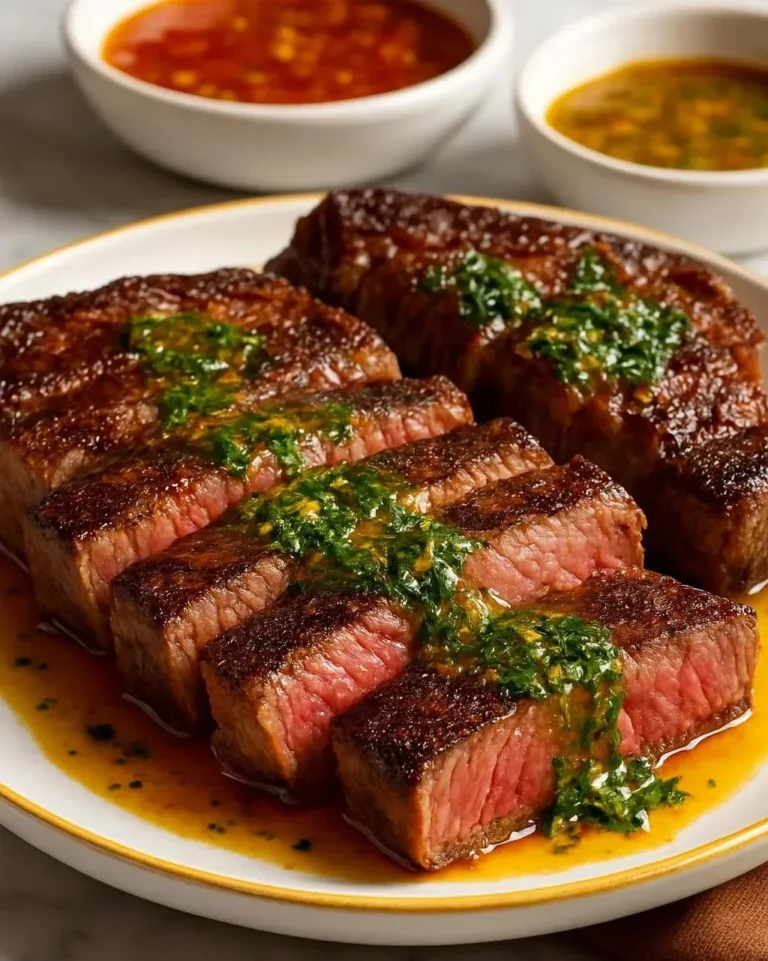

Grilled Tomahawk Steak
Grilled Tomahawk Steak
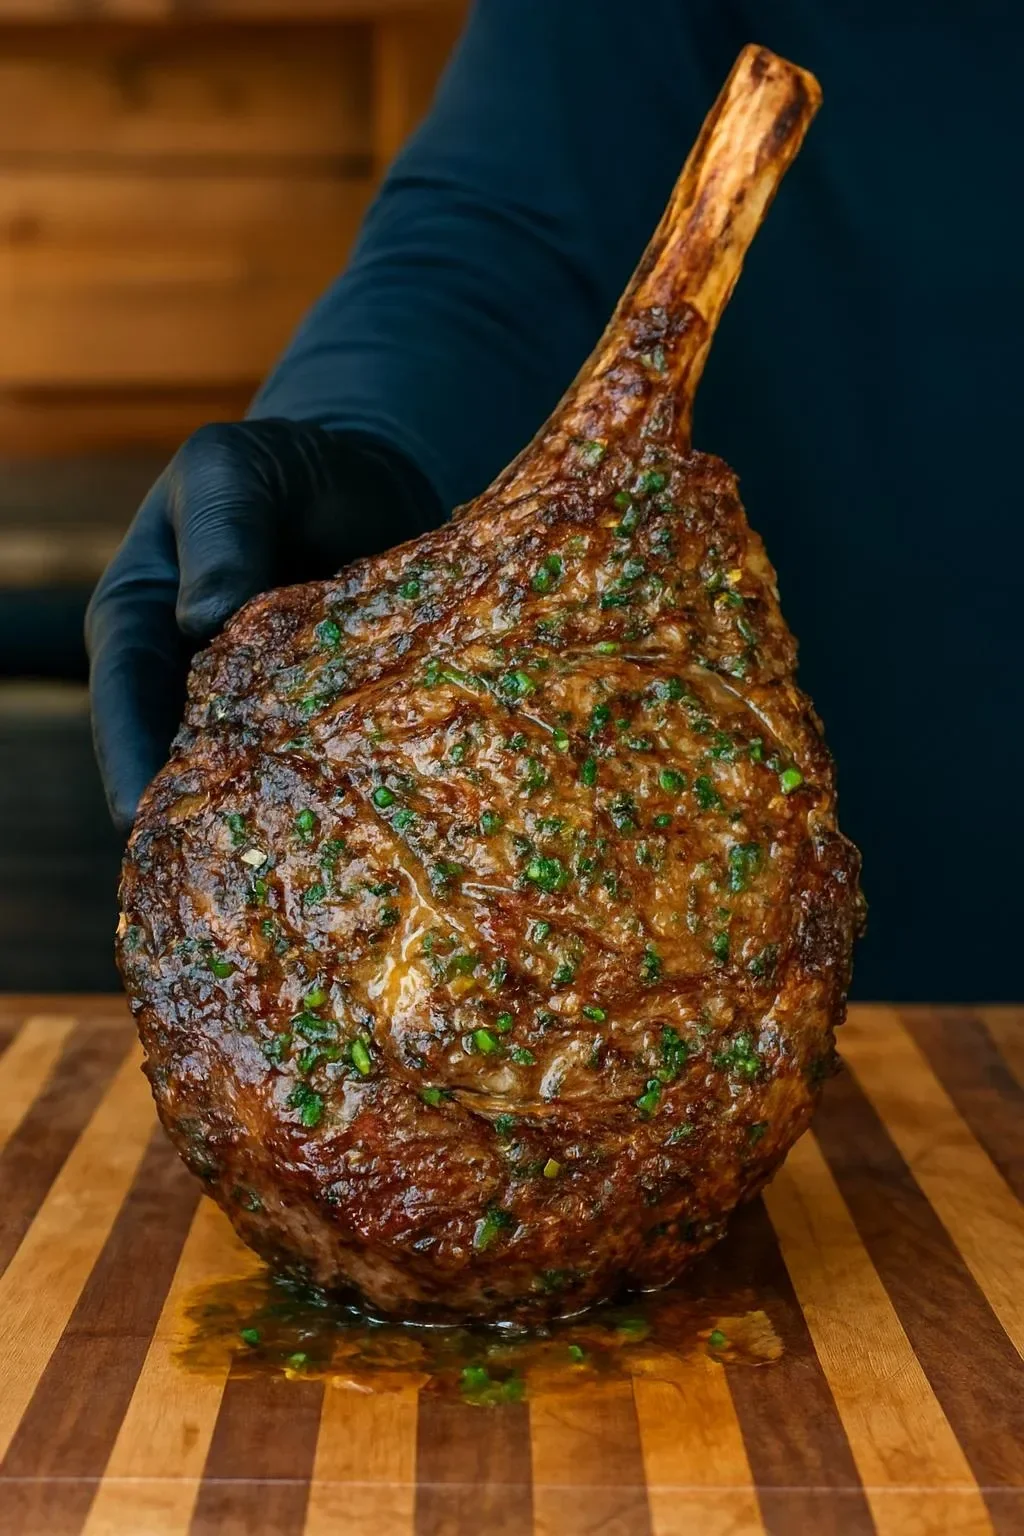
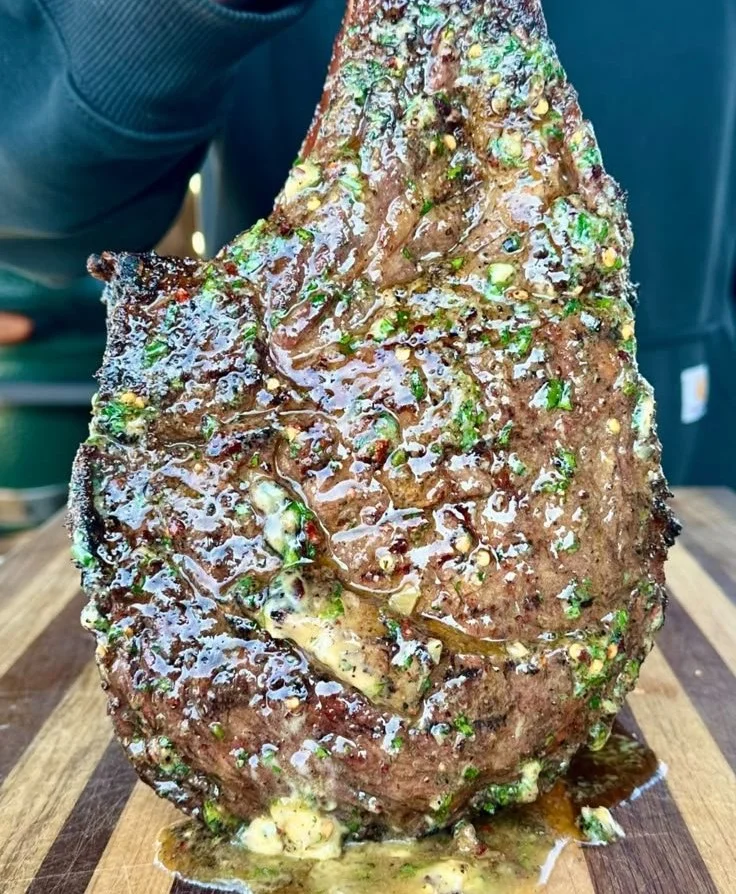
A hulking bone-in ribeye cooked over high heat rewards with intense beef flavor, a dramatic presentation, and a perfect crust with a tender center when handled right. This guide covers everything needed to execute that backyard centerpiece—from salt strategy and temperature targets to charcoal setups, direct searing, and finishing touches that ensure every bite lives up to the cut’s reputation. If you like bold, indulgent sides, one excellent complement is the best pesto grilled cheese, which echoes herb and butter notes without competing with the main protein.
What makes the cut unique and how that affects cooking
The long rib bone acts like a heat shield and flavor amplifier: the meat closest to the bone stays juicier and develops more collagen breakdown during cooking. That same size and thickness mean heat must be introduced gently and controlled to avoid a raw center or an overly charred exterior. Treat the piece like two zones—a thick primals section that benefits from low-and-slow finishing, and an outer surface that needs a high-temperature sear for Maillard development.
Because of the generous fat cap and marbling, a dry-brine or heavy seasoning works better than a wet marinade; the fat helps carry flavors and protects the muscle fibers during long cooks. The bone also complicates thermal readings, so rely on probe placement and carryover-temperature math rather than surface color alone.
Ingredients and smart seasoning notes
- High-quality bone-in rib roast (2–3 inches thick, 30–40 oz typical for a single large cut) — choose good marbling and a clean trim.
- Coarse kosher salt — for dry brine and crust formation.
- Freshly ground black pepper — add before searing to avoid burning during fat-rendering.
- Neutral oil with a high smoke point (grapeseed or avocado) — for searing.
- Optional: garlic cloves, fresh rosemary, thyme, and unsalted butter for finishing.
Notes:
- Use kosher or sea salt by weight if possible; a tablespoon per 2–3 pounds is a common baseline for dry-brining.
- Avoid sugary rubs pre-cook; sugar accelerates surface browning and risks bitter char on such a thick piece.
Equipment needed and thermometer placement
- Heavy-duty tongs and heatproof gloves.
- Instant-read thermometer and leave-in probe thermometer.
- Charcoal grill with a two-zone fire or a gas grill with adjustable heat; a cast-iron skillet or griddle for searing if needed.
- Aluminum foil, carving knife, and a board for resting.
Probe tip placement: insert into the thickest section about halfway from the bone toward the exterior muscle, avoiding contact with the bone and heavy fat pockets. The bone runs cooler and will give misleading low readings if touched.
Preparing the steak: trimming, dry-brine, and room temperature
Trim loose fat and the silver skin but leave a good fat cap for flavor. Pat the surface dry with paper towels; moisture is the enemy of a crisp crust. Apply a generous dry-brine of kosher salt at least 2 hours before cooking, or for best results, overnight uncovered in the refrigerator. Pull the cut from the fridge 45–60 minutes before cooking to reduce chill and promote even internal heating.
Seasoning order: salt during the dry-brine stage, then right before searing pat dry again and add cracked black pepper plus a light brush of oil to encourage even browning.
Step-by-step grilling method (reverse-sear technique for consistent results)
- Set up a two-zone fire: coals or burners on one side high, other side off or low for indirect cooking.
- Preheat the hot zone to searing temperature (500–700°F surface heat) and stabilize the indirect zone around 250–275°F.
- Start the steak on the indirect side with a leave-in probe in place. Cook patiently until internal temp reaches 10–15°F below your final target (see temperature guide below).
- Move to the hot zone or to a preheated cast-iron skillet and sear 60–90 seconds per side to build a deep crust. Sear the rounded edges to render fat and color the exterior evenly.
- Rest loosely tented for 10–15 minutes to allow juices to redistribute and carryover to finish the cook.
- Carve against the grain in 1/4–1/2-inch slices, serving from the thickest point outward toward the bone.
This approach minimizes overcooking while delivering a deeply caramelized exterior and even doneness through the center.
Temperature targets, carryover, and doneness tips
- Pull at 120°F for rare (finishes ~125°F after rest).
- Pull at 125°F for medium-rare (finishes ~130–135°F).
- Pull at 135°F for medium (finishes ~140°F).
Because of the large mass, expect 5–10°F carryover on a hot sear; the thicker the cut, the more residual heat will raise the internal temperature during resting. Always use an instant-read to verify before carving.
Alternative methods and variations
- Direct-high sear only: For thinner versions or if time is short, sear over high heat then move to a cooler section to finish. Expect less even doneness.
- Reverse sear on gas: Use the same two-zone principle by turning off middle burners and using outer burners for heat.
- Pan-finish: Sear on a grill, then finish in a 325°F oven with butter and herbs for 8–15 minutes depending on size.
- Flavor variations: Make a compound butter with garlic and herbs to melt over slices; coat with a coarse herb and pepper crust for an aromatic outer layer.
If you want to serve a buttery, herb-forward side that mirrors the steak’s richness, consider pairing with creative grilled sandwiches like a grilled cheese burrito as an indulgent, textural contrast.
Pro tips, timing, and grilling-day checklist
- Weigh the cut before cooking to estimate time: plan roughly 10–12 minutes per pound for the low-and-slow phase, plus searing time.
- Keep the bone oriented away from direct heat during the initial cook so the meat near the bone warms more gently.
- Use a chimney starter for charcoal to get consistent temperatures quickly and reduce flare-ups.
- Avoid flipping more than twice; excessive movement prevents a solid crust.
- Rest covered loosely with foil—tight wrapping steams the exterior and softens the crust.
Common mistakes and how to avoid them
- Not dry-brining: under-salted internal meat and weak crust. Solution: salt early and let it sit.
- Relying on color alone: surface char doesn’t equal doneness. Solution: use a probe thermometer in the thickest section.
- Searing too early: high heat while the interior is cold produces an overcooked exterior and raw center. Solution: do low-and-slow first or ensure internal temp is close to target before searing.
- Cutting too soon: slicing immediately drains juices. Solution: rest at least 10 minutes for medium-large cuts.
Storage, leftovers, and gentle reheating
Store cooled slices in an airtight container in the refrigerator for up to 3–4 days. For longer storage, vacuum-seal and freeze for up to 6 months. Reheat gently to preserve texture:
- Oven method: cover with foil at 250–275°F until warmed through (use thermometer).
- Skillet: light butter or oil over medium-low heat, cover briefly to retain moisture.
Avoid aggressive microwave reheating which toughens the meat.
Leftover beef works exceptionally well in hearty sandwiches or chopped for steak salads. For roasted vegetable alternatives, try a side that balances richness, such as simple roasted cabbage preparations like these cheesy baked cabbage steaks to add caramelized vegetal texture without overshadowing the main protein.
Pairings and finishing sauces
- Compound butter (garlic, rosemary, lemon zest) melts over sliced meat for a glossy finish.
- Classic red-wine reduction or a pan jus made from drippings lifts the savory notes.
- Sides: roasted potatoes, charred asparagus, grilled corn, or a bright salad to cut richness.
- Beverage: fuller-bodied reds like Cabernet Sauvignon, Syrah, or bold malty ales match the cut’s intensity.
Balance is key: choose one assertive side and one light element to keep the plate from becoming overly heavy.
FAQs about cooking large bone-in rib cuts
Q: How long should a 2.5-inch-thick piece take on the indirect side?
A: Plan for 30–60 minutes depending on grill temp and starting temp. Use internal temperature rather than time.
Q: Can I cook it entirely over charcoal without a two-zone setup?
A: It’s possible but riskier; without a cooler zone you’ll likely burn the exterior while the center remains undercooked. Two-zone is recommended for large cuts.
Q: Is the bone edible or just decorative?
A: The bone isn’t eaten, but it helps conduct flavor and retains moisture during cooking.
Q: Should I trim the fat cap completely?
A: No—leave some fat for flavor and protection. Trim only excessive or hanging pieces that cause large flare-ups.
Q: Can I sous-vide then finish on the grill?
A: Yes—sous-vide gives perfect doneness throughout; finish with a high-heat sear for the crust.
Final plating and carving technique
Let the cut rest long enough that juices are visible but not running; remove the bone by cutting along its length if you prefer boneless slices or serve with the bone attached for dramatic presentation. Cut across the grain into even slices to maximize tenderness and plate immediately with a warming spoonful of jus or compound butter.
With controlled heat, patience, and a reliable thermometer, a large bone-in ribeye transforms into a tender, flavor-packed centerpiece that rewards both technique and restraint.