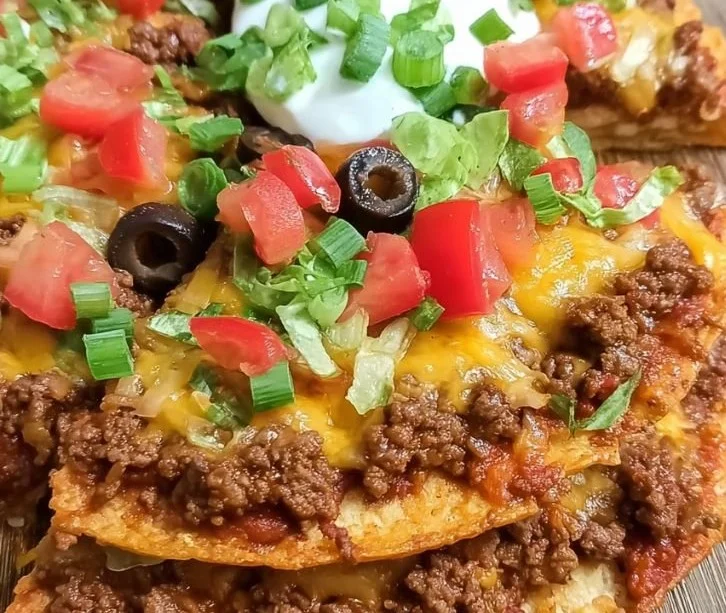

Homemade Navajo Taco (Indian Fry Bread) Recipe
A crisp, pillowy fried flatbread topped like a taco is a satisfying mix of simple dough technique and bold toppings. This guide shows a reliable way to make authentic-textured fry bread at home, how to build the classic taco-style topping, and practical tips to keep each piece light, safe to fry, and full-flavored from first bite to last.

What makes this fry bread taco stand out
This preparation focuses on a soft interior with a golden, blistered crust that holds hearty toppings without becoming soggy. The key is a short, oil-based dough that gets a brief rest and is fried at a steady temperature so it puffs, develops an even color, and keeps a light chew. Served as an open-faced taco, it balances rich, savory meats or beans, crisp vegetables, and melting cheese — all on a base that tastes freshly made but is fast enough for weeknight cooking.
Ingredients (with notes)
Yields: about 6 large pieces (serves 4–6)
- 3 cups all-purpose flour — measure by scooping and leveling for consistency.
- 1 tablespoon baking powder — gives lift and light texture.
- 1 teaspoon salt — fine sea salt or kosher salt works.
- 1 tablespoon sugar (optional) — rounds flavor; omit for strictly savory.
- 1 cup warm water (110–120°F) — warmer water speeds hydration; adjust slightly as needed.
- 2 tablespoons vegetable oil (plus more for frying) — oil in dough adds tenderness and helps the crust blister.
- Oil for frying: neutral oil with high smoke point (canola, peanut, or vegetable) — use enough to shallow-fry so pieces float and blister.
- Toppings: refried beans or seasoned ground beef, shredded lettuce, diced tomatoes, shredded cheddar, chopped onions, salsa, sour cream, pickled jalapeños — prepare toppings ahead so assembly is quick.
Notes:
- If you prefer a slightly richer dough, substitute 2 tablespoons melted butter for the oil in the dough.
- For smaller portions, divide dough to make six medium or twelve small fry breads.
Equipment needed
- Large mixing bowl
- Whisk or fork for dry ingredients
- Wooden spoon or dough scraper
- Rolling pin (optional) — you can stretch by hand
- Heavy skillet or Dutch oven for frying
- Deep fry thermometer (recommended) — for accurate oil temperature
- Slotted spoon or spider skimmer
- Paper towels and a cooling rack for draining
Step-by-step instructions
- Mix dry ingredients: Whisk flour, baking powder, salt, and sugar in a bowl until uniform.
- Add wet ingredients: Stir in warm water and 2 tablespoons oil until a shaggy dough forms. The dough should be soft but not sticky; add a tablespoon more flour if too wet.
- Knead briefly: Turn dough onto a lightly floured surface and knead 6–8 turns until smooth. Over-kneading makes it tough; keep it short.
- Rest: Cover the dough with a damp towel or plastic wrap and let rest 15–30 minutes. Rest relaxes gluten and makes shaping easier.
- Divide and shape: Divide into 6 equal pieces. Flatten each into a disk about 6–7 inches across and 1/4 inch thick. Leave a slightly thicker center so it puffs. Avoid thin edges that will burn.
- Heat oil: Pour 1 to 1.5 inches of oil into your skillet and heat to 350°F (175°C). Maintain 350–360°F while frying.
- Fry in batches: Gently lower one piece into the oil using your hand or a spatula. It should float and puff within 30–60 seconds. Fry 1–2 minutes per side until golden and blistered. Flip with a slotted spoon and cook the second side.

- Drain and rest: Remove to a paper towel-lined rack to drain briefly. Keep warm in a low oven (200°F) while frying remaining pieces.
- Assemble: Spread beans or a spoonful of seasoned meat on each bread, add shredded lettuce, tomatoes, cheese, onions, salsa, and finish with sour cream or hot sauce.

Safety tips while frying:
- Never leave hot oil unattended.
- Use a thermometer; visual cues alone can be misleading.
- Keep a lid nearby to smother small flare-ups — do not use water on hot oil.
Pro tips for a perfect texture
- Oil temperature consistency is essential: too hot burns the exterior before the center cooks; too cool soaks oil into the bread.
- Resting the dough relaxes gluten and prevents tearing when stretching.
- Keep pieces relatively uniform in thickness so they cook evenly.
- For extra puffing, press the center gently with the back of a spoon as the first side cooks — it helps steam get trapped and lift the dough.
- If you prefer lighter oil absorption, drain on a rack rather than paper towels so excess oil doesn’t pool beneath the bread.
Storage and reheating
- Cool completely before storing to prevent condensation and sogginess.
- Short-term: store in an airtight container at room temperature up to 24 hours.
- Refrigerate up to 3 days; reheat in a 350°F oven for 5–8 minutes to crisp the exterior.
- Freeze individually wrapped for up to 2 months. Reheat from frozen in a 350°F oven for 10–12 minutes or until warmed through.
- For single portions, reheat in a skillet over medium heat for a few minutes per side to restore crispness.
Pairings and serving suggestions
- Classic taco toppings: refried beans, seasoned ground beef, shredded lettuce, tomatoes, cheddar, and chopped onions.
- Lighter option: black bean and corn salad, avocado slices, lime crema, and cilantro.
- Side dishes: simple coleslaw, grilled corn, or a fresh salad cut through the richness.
- Drinks: a cold cerveza, iced tea with lemon, or a citrusy agua fresca complement the savory bread.
- If you enjoy broad, approachable bread recipes, you might also like this easy homemade focaccia bread recipe for sandwich-style meals.
Variations and ingredient swaps
- Cheesy crust: brush lightly with melted garlic butter after frying, then sprinkle parmesan.
- Whole wheat: substitute up to half the flour with whole wheat for nuttier flavor; add a splash more water as needed.
- Gluten-free: use a commercial 1:1 gluten-free flour blend and increase binding with 1 teaspoon xanthan gum if not already included.
- Quick shortcut: use biscuit dough for a fiddler-friendly, less authentic but fast option—texture will differ.
- Baked alternative: flatten and bake at 450°F on a preheated pizza stone for 8–10 minutes, flipping once; crust won’t blister like fried but reduces oil.
Common mistakes and how to fix them
- Heavy, dense bread: usually from over-kneading or too much flour. Keep kneading minimal and measure flour correctly.
- Greasy pieces: oil temperature too low or overcrowding the pan. Raise heat to 350°F and fry in smaller batches.
- Raw center: oil too hot causing exterior to brown before interior cooks, or discs too thick. Lower temperature and flatten slightly.
- Uneven color and blistering: uneven thickness or oil not hot enough. Make pieces uniform and maintain steady temperature.
- Tearing during shaping: dough was under-rested. Allow adequate rest time and handle gently.
Frequently asked questions
Q: Can I make the dough ahead of time? A: Yes — refrigerate wrapped for up to 24 hours. Bring to room temperature before shaping and frying.
Q: Is it okay to shallow-fry instead of deep-frying? A: Shallow-frying with 1–1.5 inches of oil works well; the breads will float and blister similarly. Deep-frying is unnecessary.
Q: How do I know when the oil is the right temperature without a thermometer? A: Drop a small pinch of dough into the oil. It should sizzle and rise to the surface within seconds and brown slowly. A thermometer is much more reliable, though.
Q: Can I make these smaller for appetizer portions? A: Yes — divide dough into smaller pieces and fry for shorter times. Adjust frying time to avoid over-browning.
Q: Are there traditional toppings I should know about? A: Toppings vary by family and region. Common combos include beans, ground meat, cheese, lettuce, and fresh salsa. Keep toppings ready before frying for best assembly.
Conclusion
These fried flatbreads make a hearty base for bold, customizable toppings and are straightforward once you control dough hydration and oil temperature.