
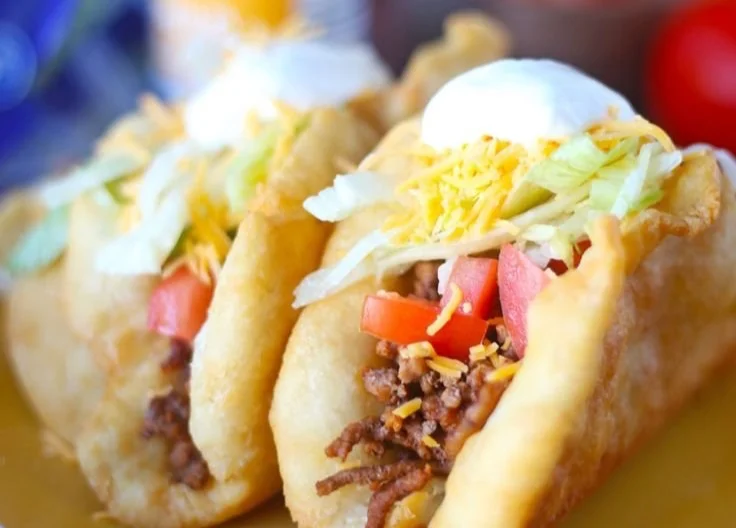
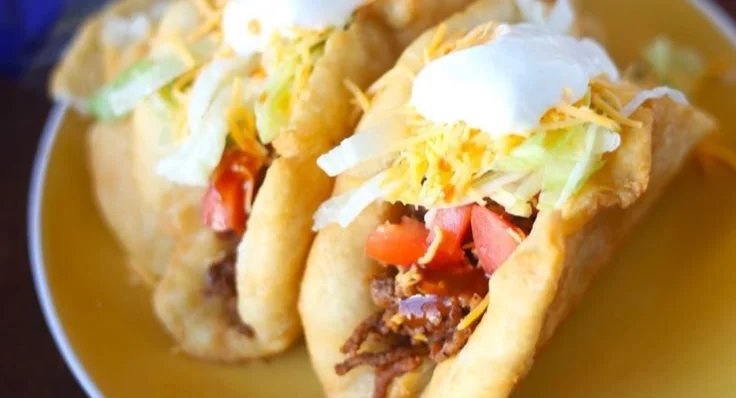
Homemade Chalupa Recipe (Better Than Taco Bell!)
Crafting restaurant-quality chalupas at home means focusing on a sturdy, slightly puffy shell that crisps on the outside while staying tender inside, plus seasoned fillings that don’t make the shell soggy. Below you’ll find ingredient notes, exact techniques for frying and shaping, troubleshooting tips, variations, and storage advice so every batch comes out better than takeout. For a quick bread refresher that pairs well with these shells, check this easy homemade focaccia bread recipe to expand your homemade Mexican-inspired spread.
Why this version stands out
This approach focuses on three performance goals: a shell that holds up to hearty fillings, quick prep for weeknight dinners, and flavors that beat the blurry fast-food version. Instead of relying on store-bought, thin tortillas that wilt, the dough is formulated to puff and hold a concave shape when fried, creating a perfect vessel for layered toppings. The technique balances crisp exterior texture with interior chew, and the seasoning strategy keeps each bite bright so the shell never tastes bland under salsa and cheese.
Ingredients (with notes)
Building the shell and the fillings requires a short, targeted list. Quantities here scale easily; for about 6–8 shells use the amounts below.
Shell dough
- 2 1/2 cups all-purpose flour — provides structure and chew.
- 1 1/2 teaspoons baking powder — the leavener that gives puff and lift without yeast.
- 1 teaspoon fine salt.
- 2 tablespoons granulated sugar — a touch for color and flavor.
- 3 tablespoons vegetable shortening or lard — fat for flakiness and crisping.
- 3/4 cup warm milk (plus up to 2 tablespoons more if needed) — hydrates the dough and gives tenderness.
- 1 large egg — helps bind and enrich.
Frying
- Neutral oil for frying (canola, peanut, or vegetable) — enough for 1–2 inches in a skillet; use lard or a blend for richer flavor.
Fillings and finishing (suggested)
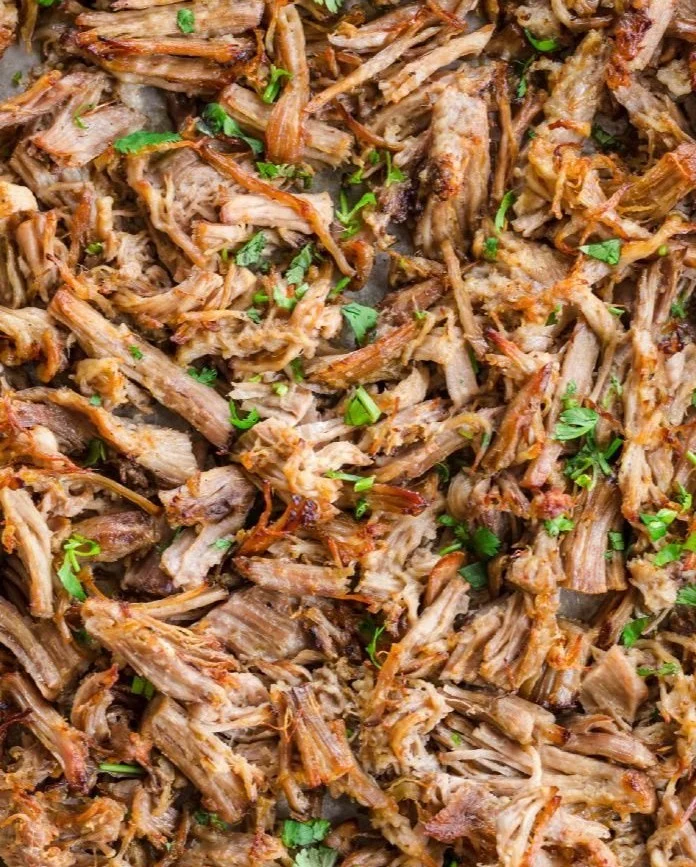
- Shredded beef, seasoned ground beef, shredded chicken, or black beans.
- Shredded cheddar or Oaxaca cheese.
- Shredded lettuce or cabbage for crunch.
- Pico de gallo or salsa verde, sliced avocado, lime wedges.
- Crema or sour cream.
Notes:
- Using lard yields a more authentic, slightly richer shell; shortening gives consistent results for home cooks.
- Baking powder (not baking soda) is essential; it’s what puffs the dough during frying.
Equipment needed
- Heavy skillet or Dutch oven large enough for shallow frying.
- Instant-read thermometer to hold frying oil steady at 350°F (175°C).
- Rolling pin (or tortilla press if using alternative doughs).
- Slotted spoon or spider for removing shells.
- Wire rack and paper towels for draining.
- Small bowl of water for sealing edges or fixing cracks.
Step-by-step instructions
Follow these steps precisely; small adjustments in temperature and thickness change the final texture.
- Make the dough:
- Whisk flour, baking powder, salt, and sugar in a bowl. Cut in shortening or lard until mixture resembles coarse crumbs.
- Whisk the egg with warm milk, then add to dry ingredients and mix until a shaggy dough forms.
- Turn onto a lightly floured surface and knead 6–8 times until smooth; avoid overworking.
- Cover and rest 20–30 minutes to relax the gluten.
- Shape the discs:
- Divide dough into 6–8 equal pieces (about 70–90g each). Roll between palms into balls.
- Lightly flour the surface and roll each ball to about 5–6 inches across and roughly 1/8–1/4 inch thick. Thinner results in crispier shells; thicker creates a softer interior. Aim for uniform thickness.
- Heat the oil:
- Pour oil into a skillet to a depth of about 1–1.5 inches. Heat to 350°F (175°C). Use an instant-read thermometer to maintain temperature—too cool yields oily, soggy shells; too hot burns the exterior before the inside cooks.
- Fry and shape:
- Carefully slide one dough disc into the oil. Fry 30–45 seconds, then use tongs or a spatula to gently press the center so the disc forms a concave bowl; flip and fry another 20–30 seconds until golden and puffed.
- Remove to a wire rack lined with paper towels to drain. Shape minor irregularities while hot using tongs or a spatula.

- Keep shells warm and crisp:
- Set finished shells in a single layer; avoid stacking until fully cooled. If making ahead, re-crisp in a 375°F oven for 5–7 minutes or in an air fryer at 350°F for 3–4 minutes.
- Build and serve:
- Layer warm shell with a base of beans or meat, cheese that will melt slightly from the shell’s warmth, crisp lettuce or cabbage, salsa, avocado, and a drizzle of crema. Serve immediately.
Alternative quick method: Use thick flour tortillas or frozen pizza dough for a loaf-style shell—pan-fry and press to shape, then finish in the oven. Results are slightly different but work when pressed for time.
Pro tips for crisp, non-soggy shells
- Fry at steady 350°F. Small fluctuations ruin texture faster than most people expect.
- Don’t overfill shells. Place moist elements (salsa, tomatoes) in a thin layer and add lettuce or cabbage between the filling and salsa to create a moisture barrier.
- Salt shells the moment they come out of the oil; it adheres while they’re hot and enhances the whole bite.
- If shells become soft from steam, re-crisp in an oven rack or air fryer rather than repeating frying.
- Use a shallow fry depth rather than full deep-fry for easier shaping and even color.
Storage and make-ahead strategy
- Dough can be refrigerated up to 24 hours tightly wrapped; bring to room temperature 20–30 minutes before shaping.
- Cooked shells freeze well in a single layer on a tray; once solid, stack with parchment paper and store in a zip bag up to 2 months. Reheat in a 375°F oven for 6–8 minutes.
- Store fillings separately. Keep salsas and avocado toppings chilled and add them right before serving to prevent sogginess.
Perfect toppings and pairings
- Classic: seasoned shredded beef, cheddar, shredded lettuce, pico de gallo, and crema.
- Vegetarian: charred poblano strips, refried beans, cotija, pickled red onion, and salsa verde.
- Spicy: chipotle-marinated chicken, pepper jack, pickled jalapeños, cilantro, and a squeeze of lime.
For an easy, crowd-pleasing side that complements the savory shells without stealing spotlight, consider pairing with one-pan mains explored in this curated list of one-pan gnocchi recipes.
Variations and dietary substitutions
- Corn masa version: Replace the flour dough with a thick masa harina dough (masa + hot water + fat). Press in a tortilla press, fry gently, and shape while warm. The texture is grittier and corn-forward.
- Baked option: Brush shaped dough lightly with oil and bake at 425°F for 10–12 minutes until golden, flipping midway. Not as puffy, but lower fat.
- Gluten-free: Use a certified gluten-free flour blend designed for frying and add a touch more liquid; results vary by brand.
- Air-fryer shortcut: Brush discs with oil and air-fry at 360°F for 4–6 minutes, flipping once. Ideal for smaller batches.
Common mistakes and how to avoid them
- Dough too thin: results in brittle shells. Measure and roll consistently; thicker discs will puff and hold fillings.
- Oil temperature inconsistent: use a thermometer and adjust heat; avoid overcrowding the pan which drops oil temperature.
- Storing assembled chalupas: never assemble far ahead; moisture from fillings breaks down shell integrity.
- Skipping the rest: the short rest relaxes gluten and prevents springback while frying, making shaping easier.
Frequently asked questions
Q: Can I use store-bought tortillas to save time? A: Yes—thicker flour tortillas can be reshaped and fried for a decent shortcut, but homemade dough gives the best lift and structural integrity.
Q: Why didn’t my shells puff? A: Likely causes are dough too cold, discs rolled unevenly, or oil temperature too low. Make sure baking powder is fresh and oil is at 350°F.
Q: How do I get the inside tender but outside crispy? A: Control thickness (about 1/8–1/4 inch) and fry briefly at the correct temperature; the baking powder creates internal steam that keeps the interior tender while the oil crisps the outside.
Q: Are these safe to prep for a party? A: Yes—make the shells ahead and re-crisp before serving; keep toppings assembly-line ready for fast assembly.