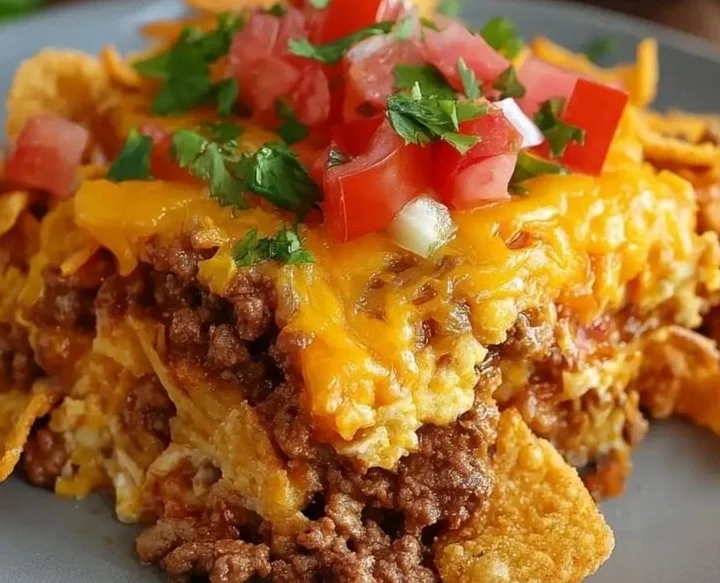
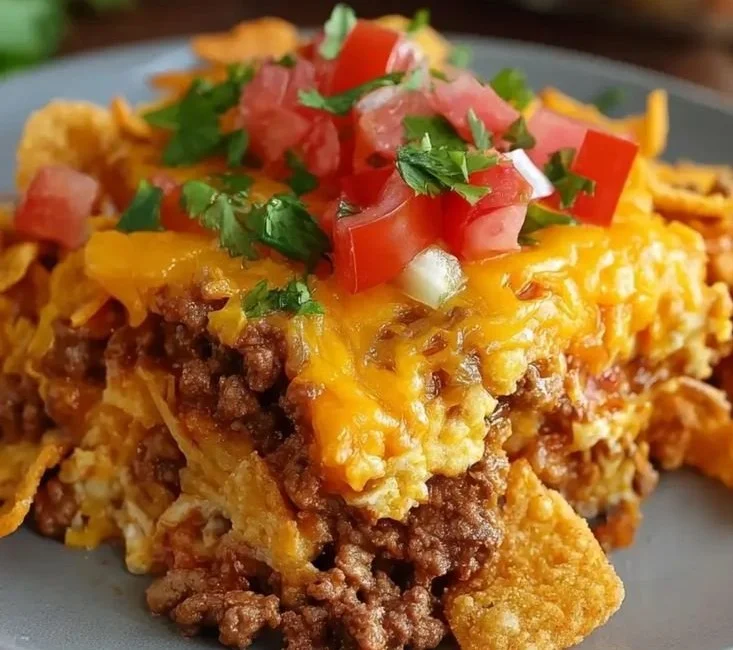
Tex Mex Taco Casserole
Tex Mex Taco Casserole
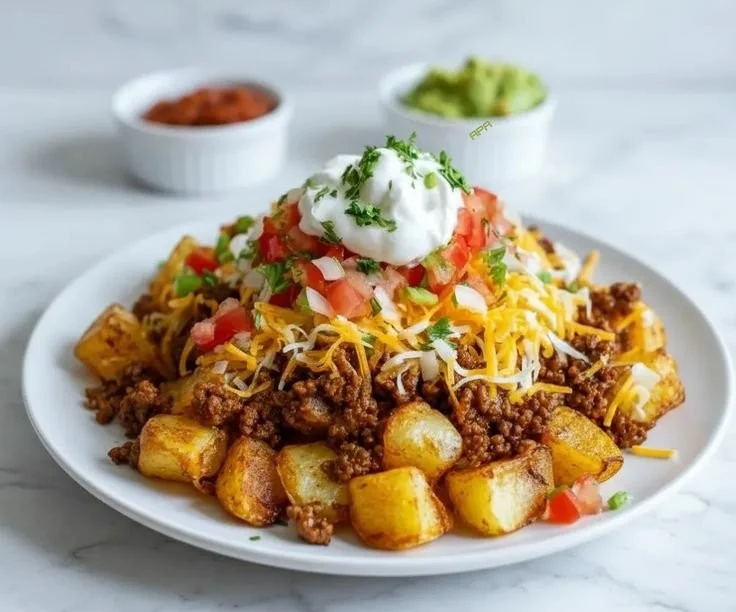
A layered, hearty bake that combines seasoned ground meat, beans, tortillas or chips, and melty cheese into one-pan comfort—perfect for feeding a family or meal-prepping for the week. If you prefer slow-simmered, hands-off options for busy nights, explore some compatible crockpot Mexican ideas at easy crockpot Mexican recipes to pair with this style of dinner.

What makes this baked taco dish stand out
This casserole turns familiar taco flavors into a comforting oven dish that’s portable, scalable, and forgiving. Instead of individually assembled tacos, layers lock in moisture and allow toppings to meld into the filling, creating a bold flavor profile in every bite. The structure also makes it easy to adapt for dietary needs and to use pantry staples and leftovers without losing texture or taste.
Ingredients with practical notes
- 1 lb ground beef, turkey, or plant-based crumbles — choose lean meat to reduce excess grease; drain if needed.
- 1 small onion, finely chopped — sautée until translucent to build a savory base.
- 2 cloves garlic, minced — add toward the end of sautéing to avoid bitterness.
- 1 packet taco seasoning or 2½ tbsp homemade mix (chili powder, cumin, smoked paprika, onion powder, garlic powder, oregano, salt) — homemade seasoning allows sodium control.
- 1 can (15 oz) diced tomatoes, drained — fire-roasted adds depth.
- 1 can (15 oz) black beans, rinsed and drained — adds protein and bulk; pinto beans are a good swap.
- 1 cup frozen corn, thawed — for sweetness and texture contrast.
- 8–10 small flour or corn tortillas, torn or layered — flour yields softer texture; corn gives a firmer bite.
- 2 cups shredded cheddar or Mexican blend — a mix of cheeses melts and browns best.
- 1 cup enchilada or salsa verde for moisture — adjust salt and heat levels to taste.
- Optional: sliced jalapeños, chopped cilantro, green onions, sour cream, or pickled red onions for finishing.
Notes:
- If using chips instead of tortillas, choose thick sturdy varieties to avoid complete sogginess.
- For lower sodium, rinse canned items and use no-salt-added tomatoes and beans.
- To make it gluten-free, confirm tortillas or use tortilla chips labeled gluten-free.
Equipment needed
- 9×13-inch baking dish or equivalent shallow casserole pan.
- Large skillet for browning meat and building the filling.
- Spatula and wooden spoon.
- Measuring cups and spoons.
- Optional: oven-safe skillet (cast iron) for a single-pan method.
Having an oven thermometer helps ensure even baking, and a heavy-bottom skillet improves caramelization for the meat layer.
Step-by-step assembly and baking
- Preheat oven to 375°F (190°C).
- In a large skillet over medium-high heat, add a tablespoon of oil and cook onion until soft, about 4 minutes. Add garlic and cook 30 seconds.
- Add ground meat and break it apart. Cook until no longer pink and edges begin to brown. Drain excess fat if needed.
- Stir in taco seasoning, diced tomatoes, beans, and corn. Simmer 3–5 minutes so flavors combine. Taste and adjust seasoning.
- Spread a thin layer of enchilada sauce or salsa in the bottom of the baking dish to prevent sticking.
- Place a single layer of torn tortillas in the dish (or a partial layer of chips). Spoon half the meat mixture over, then sprinkle 1 cup of cheese.
- Repeat layers: more tortillas, the remaining meat mixture, and the rest of the cheese. Finish with a light drizzle of sauce to keep the top from drying.
- Cover loosely with foil and bake 20 minutes. Remove foil and bake an additional 8–10 minutes until cheese is bubbly and edges brown.
- Let rest 5–10 minutes before slicing to help the casserole set.
For a crustier top, broil 1–2 minutes at the end—watch closely to avoid burning.
Pro tips for best texture and flavor
- Brown meat well for Maillard flavors—don’t overcrowd the pan or it will steam instead.
- Slightly underbake if you plan to reheat individual portions later; overbaking dries it out.
- Tear tortillas rather than cutting for irregular edges that trap sauce and building a better texture.
- If you like a saucier dish, mix ½ cup sour cream into the sauce layer for creaminess.
- Use a blend of cheeses (half Monterey Jack or mozzarella and half cheddar) for a gooey but flavorful melt.
- For crowd feeding, double the recipe and use two pans; baking time won’t increase much if layer depth is similar.
Storage, reheating, and make-ahead strategies
- Refrigerate: Cool to room temperature, cover tightly, and store up to 4 days.
- Freeze: Assemble in a foil pan and freeze for up to 3 months. Thaw overnight before baking. Add 10–15 extra minutes to covered baking time if baking from chilled but thawed.
- Reheat: Individual portions reheat well in a microwave (1–2 minutes) or in a 350°F oven covered for 10–15 minutes until hot through.
- Meal prep tip: Assemble in single-serving ramekins for grab-and-go lunches; reduce bake time to about 12–15 minutes at 375°F.
Pairings and serving suggestions
Serve slices with crisp, bright sides to contrast the rich layers:
- Fresh salad with lime vinaigrette.
- Cilantro-lime rice or simple Spanish rice.
- Pickled red onions or quick pico de gallo for acidity.
- Guacamole or sliced avocado for creaminess.
Pair with light beers or a refreshing agua fresca for a balanced meal.
Variations to adapt tastes and diets
- Slow-cooker version: Layer ingredients (omit cheese on top), cook on low 3–4 hours, add cheese in the final 10 minutes under broil or high heat. For more slow-cooking ideas, compare these easy authentic Mexican food recipes that translate well between oven and slow-cooker methods.
- Vegetarian: Replace meat with crumbled tempeh, extra beans, or a sautéed mix of mushrooms and walnuts seasoned with chili and cumin.
- Low-carb: Use thinly sliced zucchini or eggplant as interlayers instead of tortillas, or build a skillet casserole using riced cauliflower.
- Gluten-free: Use certified gluten-free tortillas or sturdy corn tortillas; confirm seasoning is gluten-free.
- Spicy or mild: Adjust heat by choosing a hot salsa, adding diced chiles, or keeping to mild taco seasoning and fresh jalapeños on the side.
Common mistakes and how to avoid them
- Mistake: Overloading with sauce. Result: soggy, indistinct layers. Fix: Use sauce sparingly between layers; rely on the meat mixture’s moisture.
- Mistake: Not letting it rest. Result: sloppy slices that fall apart. Fix: Rest 5–10 minutes; cooling lets juices redistribute.
- Mistake: Using very thin tortillas without tearing. Result: mushy binder. Fix: Toast tortillas briefly or use thicker flour tortillas.
- Mistake: Skipping seasoning checks. Result: bland casserole. Fix: Always taste the filling and adjust salt/acid before assembling.
- Mistake: Baking too hot to rush. Result: dry casserole with burnt edges. Fix: Bake at 375°F and use foil for the initial bake to retain moisture.
Frequently asked questions
Q: Can I assemble this ahead and bake later?
A: Yes. Assemble, cover, and refrigerate up to 24 hours before baking. Add a few extra minutes to bake time if chilled.
Q: How can I make it lower in fat?
A: Choose lean ground turkey or plant-based crumbles, drain excess fat after browning, and reduce cheese by 25% or use part-skim options.
Q: Is there a way to make individual portions?
A: Yes—use ramekins or muffin tins. Reduce bake time to 12–15 minutes at 375°F, depending on depth.
Q: Can leftovers be crisped up?
A: Yes—pan-fry slices in a nonstick skillet for a crispy exterior or broil wedges briefly to restore texture.
Q: What’s the best cheese for melting?
A: A combination of Monterey Jack (or mozzarella) and cheddar provides both stretch and flavor.
Final serving notes and variations to try next time
This layered taco bake is an efficient family meal that’s easy to personalize while reliably delivering comforting results. Experiment with proteins, cheeses, and toppings to dial in the texture and heat you prefer, and use the storage tips to make weeknight dinners one less thing to think about.