
Tender Chicken Braciole: A Quick Italian Dinner Delight
Why this approach makes a fast, tender Italian weeknight main
This recipe focuses on quick techniques and flavor layering to produce consistently juicy chicken rolls with classic Italian seasonings — perfect for busy weeknights when you want something impressive without a long simmer. Using thinly pounded breast, a flavorful stuffing, and a short braise or oven-finish keeps cook time low while ensuring the meat remains tender and infused with sauce. If you like fast Italian dinner ideas that still feel special, try pairing it with an Italian grinder salad sandwich on nights when you need variety for family or guests.
Ingredients with notes for reliable tenderness and flavor
- Boneless, skinless chicken breasts — 3 large (about 1.5–2 lbs), halved horizontally to make 6 cutlets; choose breasts of similar size so they cook evenly.
- Breadcrumbs — 1/2 cup (use panko for crunch or fine pantry breadcrumbs for a softer texture).
- Grated Pecorino Romano or Parmesan — 1/3 cup; adds salt and umami to the stuffing.
- Fresh parsley and garlic — 2 tbsp chopped parsley, 2 cloves minced garlic; fresh herbs brighten the filling.
- Prosciutto or thinly sliced salami — 4–6 slices optional for classic Italian flavor and extra fat to keep the roll moist.
- Red pepper flakes — 1/4 tsp optional for gentle heat.
- Egg — 1 large, beaten; binds the stuffing so it doesn’t fall out during cooking.
- Olive oil — 2 tbsp for searing; use a neutral oil if you prefer.
- Crushed tomatoes or marinara — 2 cups for braising; choose a quality jarred sauce or crushed tomatoes for a fresh finish.
- Salt and black pepper — to taste.
- Lemon zest — 1 tsp optional to brighten the finished dish.
Notes:
- Using thin, pounded cutlets reduces cooking time and prevents dryness compared with whole breasts.
- A small amount of cured meat in the stuffing adds moisture and savory depth; omit for poultry-only or lighter versions.
- If you prefer lower sodium, scale back the cheese and use an unsalted breadcrumb or add more herbs.
Equipment that speeds prep and improves results
- Heavy skillet (10–12 inch) with lid — for searing then braising; retains heat and produces a good fond.
- Meat mallet or rolling pin — for pounding breast to even thickness.
- Toothpicks or kitchen twine — secure rolls so they hold shape while cooking.
- Baking dish (optional) — for finishing in the oven if you prefer.
- Instant-read thermometer — removes guesswork; chicken should reach 165°F (74°C) in the thickest part of the roll.
Using a heavy skillet with a lid lets you sear for color and then cover to finish gently, trapping steam that keeps the chicken tender.
Step-by-step method for consistently tender results
- Prep the chicken: Trim any fat and slice each breast horizontally to create two thinner cutlets. Place between plastic wrap and pound to an even 1/4-inch thickness. Even thickness ensures all rolls finish at the same time without overcooking.
- Make the stuffing: In a bowl combine breadcrumbs, grated cheese, parsley, garlic, egg, and a pinch of salt and pepper. Stir until just combined — it should hold together but not be soggy. Fold in cured meat if using.
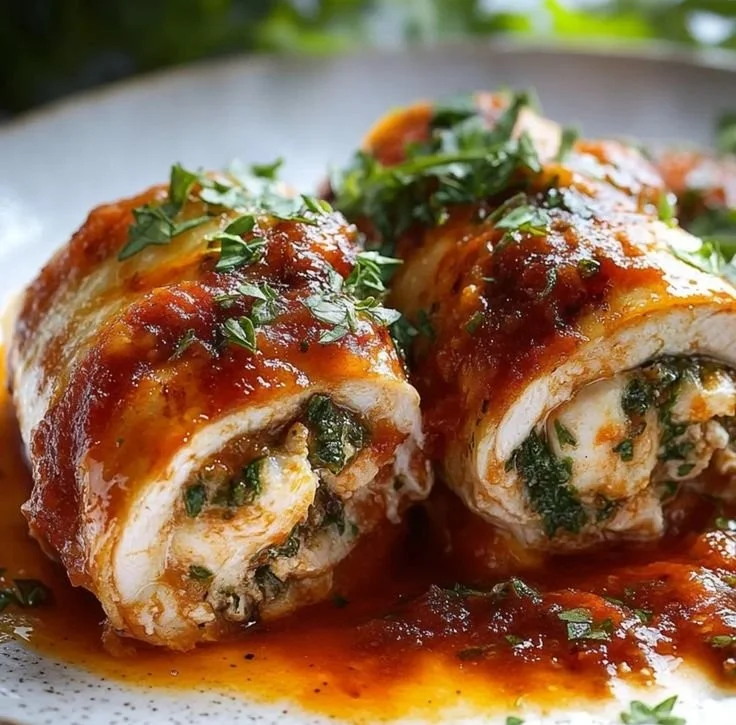
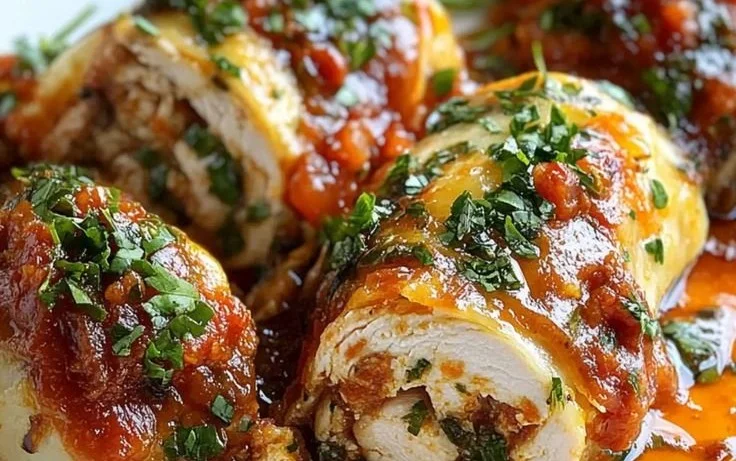
- Assemble the rolls: Spoon 1–2 tablespoons of stuffing onto each cutlet near one edge. Roll tightly toward the opposite edge and secure with a toothpick or tie with kitchen twine. A compact roll cooks more evenly and keeps juices inside.
- Sear for color: Heat 1–2 tablespoons olive oil in the skillet over medium-high. Add rolls seam-side down to seal; brown on all sides, about 2 minutes per side. Do not crowd the pan — work in batches if needed. Browning adds flavor through the Maillard reaction but is not where tenderness comes from.
- Braise gently: Reduce heat to medium-low and add crushed tomatoes or marinara to the pan, spooning sauce around (not directly over) the rolls to avoid dislodging stuffing. Cover and simmer for 12–15 minutes until the internal temperature hits 165°F. Short, covered braising steams the chicken so it stays tender and infused with sauce.
- Finish and rest: Remove rolls from sauce, let rest 5 minutes to redistribute juices, then slice on the bias or serve whole with sauce spooned over. If you prefer a slightly roasted finish, transfer the skillet to a preheated 375°F oven uncovered for 6–8 minutes after braising.
Timing tips:
- Total active time: about 20–30 minutes prep, 15–25 minutes cooking.
- Pounding and even stuffing are the best investments for quick, reliable tenderness.
Pro techniques to maximize succulence and flavor
- Brine for extra-moisture: A quick 15–30 minute salt-and-sugar brine (1 tablespoon salt + 1 tablespoon sugar per 2 cups water) briefly before pounding adds internal moisture for very dry-prone breasts. Pat dry before stuffing.
- Use a light binder: Egg helps keep filling intact; too much liquid will steam the stuffing and make it loose. Aim for a slightly tacky mixture.
- Sear just for color: Don’t over-brown — 45–90 seconds per side is usually enough once the oil is hot. Over-searing adds time and risks drying the exterior before the inside is done.
- Layer flavors: Add zest or a splash of vinegar to the braising sauce at the end to brighten deep tomato flavors without more salt.
- Rest before slicing: Resting 4–6 minutes locks juices in the meat rather than on the cutting board.
Common mistakes and how to correct them
- Overcooking the chicken: Result is dry, stringy meat. Prevent this by pounding cutlets thin, using a thermometer, and finishing with brief braising rather than long high heat. If already dry, slice thinly and serve with extra sauce or shred and fold into sauce to reclaim moisture.
- Loose stuffing that spills out: Caused by too-wet filling or rolling too loosely. Remove excess filling moisture (squeeze squeezed spinach, reduce egg slightly), roll tightly, and secure with toothpicks.
- Sauce too thin or too watery: Simmer uncovered for a few minutes after braising to concentrate flavors. Alternatively, stir in a tablespoon of tomato paste to thicken quickly.
- Crowding the pan during sear: Lowers temperature and yields steam instead of a brown crust. Brown in batches and keep finished rolls warm on a baking sheet in a 200°F oven.
Variations and serving combinations to suit any night
- Light version: Skip cured meat and use low-fat cheese with added fresh basil and spinach for a lighter roll. Bake in a shallow pool of marinara for a no-sear option.
- Cheesy centerpiece: Insert a strip of fresh mozzarella or provolone in the stuffing for a melty center; be careful to seal edges well.
- Crowd-pleaser skillet: Make larger portions, nest rolls in sauce, and top with more cheese; finish under the broiler for a bubbly topping.
- Weeknight shortcut: Use pre-made meatballs-style filling and flatten thin chicken cutlets over it for a faster assembly.
For a fast side that pairs particularly well on busy nights, serve the rolls with a simple vegetable-forward dish like this 10-minute air fryer chicken sausage and veggies to keep prep efficient while offering complementary textures and flavors.
Storage, reheating, and make-ahead planning
- Refrigeration: Store cooled rolls in an airtight container with sauce for up to 3 days. The sauce prevents drying.
- Freezing: Freeze individually wrapped rolls in sauce for up to 3 months. Thaw overnight in the fridge before reheating.
- Reheating: Gently reheat on the stovetop in a covered skillet over low heat until warmed through, or microwave covered in short bursts to retain moisture. Use a splash of water or extra sauce to prevent drying.
- Make-ahead strategy: Assemble rolls and refrigerate unseared up to 24 hours; sear and braise when ready to serve. This cuts evening hands-on time substantially.
Frequently asked questions
Q: Can I use thighs instead of breasts?
A: Yes. Boneless skinless thighs handle slightly longer cooking without drying and add richness; adjust timing as thighs may require a few extra minutes to reach safe temperature.
Q: Is there a gluten-free option?
A: Swap regular breadcrumbs for gluten-free breadcrumbs or almond flour and verify your sauce is gluten-free. Binders like egg still work the same.
Q: How do I prevent stuffing from making the chicken soggy?
A: Keep stuffing moderately dry (use minimal liquid ingredients), roll tightly, and sear before braising to set the exterior.
Q: Can I make this dairy-free?
A: Omit the grated cheese and replace with extra herbs and a touch of nutritional yeast for savory notes, or increase the amount of cured meat if not avoiding pork.
Q: How long should I braise if my rolls are thicker?
A: Add 5–8 minutes and use an instant-read thermometer; the target is 165°F in the center.
Final plating and quick weeknight workflow
Plate rolls sliced on the bias with a few spoonfuls of braising sauce, a sprinkle of chopped parsley, and a light drizzle of good olive oil or a squeeze of lemon to lift the flavors. For a streamlined weeknight plan: flatten and stuff the chicken the night before, quick-sear and braise when ready, and serve with a simple green salad or roasted vegetables to keep the meal balanced, fast, and satisfying.