
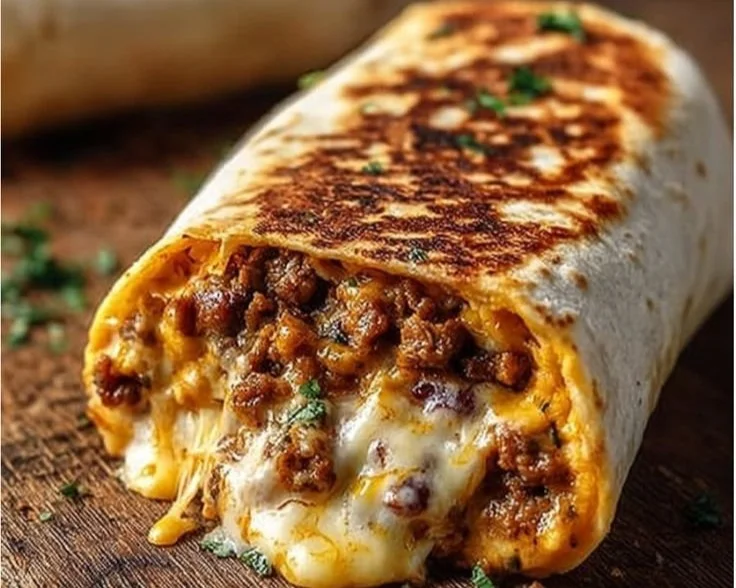
Grilled Cheese Burrito
A handheld sandwich that folds melty cheese, savory fillings, and a crisp exterior into a portable meal requires a balance of textures and flavors to truly work. This article breaks down the approach to building a perfect cheesy, wrapped melt: what to stock, which techniques create the crispiest shell and the meltiest interior, plus variations, storage tips, and common pitfalls to avoid. If you want a ready-made reference for an assembled version on the same site, check the full recipe and tips that complement these techniques.
What this handheld mash-up aims to achieve
The goal is a sandwich-like wrap with an outer surface that’s golden and slightly crisp, and an interior where cheese becomes molten and fillings stay juicy without making the tortilla soggy. Achieving that requires controlling moisture, layering ingredients to direct heat, and using fat wisely to encourage browning. Each step below focuses on getting predictable results every time, whether you make a quick lunch or feed a crowd.
Ingredients and notes for dependable results
Choose ingredients that contribute to structure, flavor, and melting behavior.
- Tortillas: large flour tortillas (10–12 inch) hold fillings without tearing and crisp evenly. Lower-moisture wraps or lightly warmed tortillas roll more cleanly.
- Cheese: a blend of fast-melting and flavorful cheeses works best — think sharp cheddar for bite, mozzarella for stretch, and Monterey Jack for smooth melt. Avoid pre-shredded cheese blends with anti-caking agents if maximum melt is desired.
- Protein: cooked, shredded chicken, seasoned ground beef, or crisped bacon all add texture. Ensure proteins are fully cooked and drained of excess fat or liquid.
- Vegetables: quick-sautéed peppers and onions, or lightly dressed greens, add freshness. Sauté vegetables until just tender to remove excess moisture.
- Binding elements: a smear of cream cheese, sour cream, or refried beans keeps fillings together and slows moisture migration that can make the wrap soggy.
- Seasoning/sauces: use concentrated sauces (pesto, chipotle mayo, salsa roja) sparingly; watery salsas should be reduced or thickened.
Small notes:
- Grate block cheese yourself for best melt.
- Cool hot fillings briefly before assembling to prevent steam buildup.
- Use a light oil or butter for outer to promote even browning.
Equipment that makes a difference
The right tools streamline technique and improve consistency.
- Heavy skillet or cast-iron pan: provides even heat and good contact for browning.
- Nonstick pan: easier cleanup and fewer sticking issues for delicate wraps.
- Press or spatula: use a weighted press or another pan to compress the wrap slightly while browning.
- Oven or toaster oven (optional): helps hold multiple assembled wraps warm and maintain melt without over-browning.
- Fine grater and bench scraper: for quick, even cheese and tidy assembly.
Step-by-step assembly and cooking method
Follow a sequence that prioritizes leak-free rolling and optimal melt.
- Prepare fillings in advance: fully cook proteins; sauté vegetables until just tender and drain any excess oil.
- Warm the tortilla briefly (10–15 seconds per side on a hot dry skillet or 10 seconds in microwave wrapped in a damp paper towel). Warmth improves pliability and prevents cracking.
- Layer strategically: spread a thin binding layer (cream cheese, refried beans, or a smear of mayo) in the center. Add cheese next — a base layer of cheese beneath wetter ingredients acts as a moisture barrier. Place proteins and vegetables on top, finishing with another thin cheese layer to promote internal melt.
- Fold technique: fold the sides inward first, then roll from the bottom edge upward, keeping fillings compact. Tuck in the edges as you roll to create a tight seam.
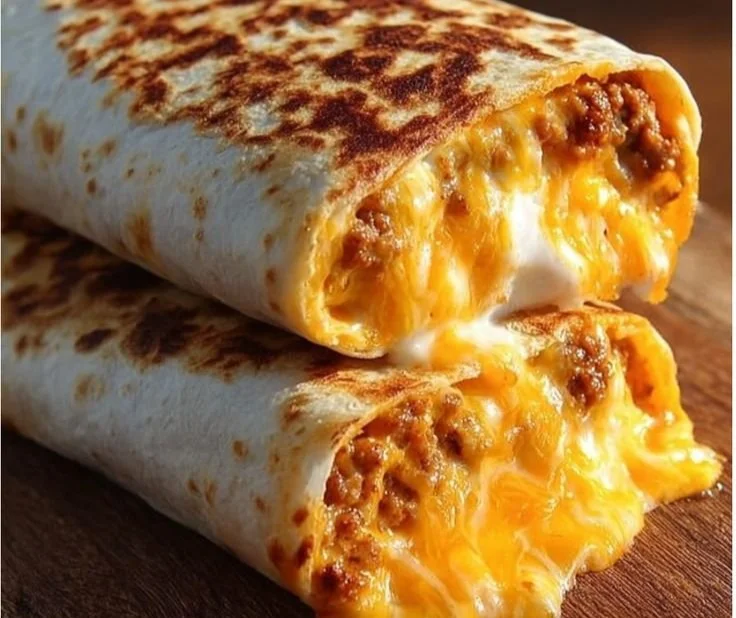
- Browning: add a small amount of butter or oil to a medium-hot skillet. Place seam-side down and press with a spatula or weight to seal while browning for 2–3 minutes per side until golden. Reduce heat if cheese is not melting by the time the exterior is browning — you want internal melt without burning the shell.
- Rest briefly: transfer to a wire rack for 1–2 minutes before slicing to let steam redistribute and prevent sogginess when cut.
Pro tips for maximum melt and crisp
Small adjustments yield big improvements.
- Double layer the cheese: one layer under fillings, one on top ensures a molten core and sealed edges.
- Use a tiny amount of cornstarch mixed with shredded cheese if you need to add moisture control — it helps absorb small amounts of liquid.
- For evenly melted cheese without over-browning, finish in a 350°F oven for 4–6 minutes after searing.
- If making multiple at once, keep finished wraps on a baking sheet in a warm oven (200–225°F) loosely tented with foil to maintain texture.
- For extra crunch, brush the outside with an oil-and-parmesan mix before toasting.
Variations to suit taste and season
This handheld platform adapts easily.
- Southwestern: pepper jack, black beans, roasted corn, chipotle mayo, cilantro.
- Breakfast: scrambled egg, cheddar, diced ham, a smear of cream cheese.
- Veggie-forward: roasted mushrooms, caramelized onions, goat cheese, arugula.
- Italian-inspired: tomato sauce reduced to a thick paste, mozzarella, thinly sliced salami, basil — for a flavor lift try a pesto-based variation as a finishing spread.
Each variation follows the same assembly and browning rules: keep wet ingredients concentrated and protect the tortilla with cheese layers.
Storage and reheating without losing texture
Handle leftovers to preserve melt and avoid sogginess.
- Short-term: wrap cooled portions tightly in foil and refrigerate up to 3 days.
- Freezing: wrap tightly, place in an airtight container, and freeze up to 1 month. Thaw overnight in the refrigerator before reheating.
- Reheating: re-crisp in a 350°F oven or toaster oven for 8–10 minutes, flipping once, until heated through. Avoid microwaving unless you first cover with a paper towel and plan to finish in a skillet to restore crispness.
Common mistakes and how to avoid them
Knowing frequent errors prevents wasted effort.
- Overfilling: too much filling prevents a tight roll and leads to messy seams. Use a moderate amount and tuck layers as you roll.
- Wet fillings placed directly on tortilla: watery salsas or tomatoes cause sogginess. Drain, pat dry, or reduce sauces to a thicker consistency.
- High heat without weight: scorching the outside before cheese melts. Press and moderate heat allows even melt and crust.
- Using only pre-shredded cheese: anti-caking agents reduce meltability. Grate from a block when possible.
Pairings and serving suggestions
Serve with complementary textures and flavors that highlight the melt.
- Acidic sides: quick pickled red onions or a limey slaw cut through richness.
- Dipping sauces: a thickened salsa, chimichurri, or a roasted garlic mayo enhance the experience. Avoid thin brothy dips that will soak the tortilla.
- Simple side salad: peppery greens with a citrus vinaigrette provide balance without overshadowing the main flavors.
Troubleshooting common problems
If something goes wrong, diagnose quickly.
- If the exterior burns before the interior melts: lower heat, add a lid for a minute to trap heat, or finish in the oven at a moderate temperature.
- If the wrap falls apart when flipped: press seam-side down for longer to seal, and ensure tortilla was warm and pliable at assembly.
- If fillings are cold in the center: reduce filling thickness, preheat fillings slightly, or cover and finish in a 350°F oven for a few minutes after searing.
Frequently asked questions
What kind of tortilla keeps crisp best?
- Medium-to-large flour tortillas crisp more consistently than corn; thin tortillas can tear while large burrito-style wraps allow for a tighter roll and even browning.
Can I make these ahead for a party?
- Yes. Assemble and sear briefly to hold structure, then finish in the oven just before serving. Keep warm in a low oven to maintain texture.
How do I prevent soggy seams?
- Use cheese as a moisture barrier around the seam and press seam-side down until it’s sealed and golden. Avoid overloading near the edges.
How long will leftovers keep quality?
- Refrigerated, plan to eat within 2–3 days. Reheat in the oven or skillet to restore crispness; microwaving will cause a soft, steamed tortilla.
Which cheese combination is most reliable for melt?
- A mix of a sharp cheddar for flavor and mozzarella or Monterey Jack for stretch and smoothness provides consistent melt and flavor balance.
Keep these principles in mind—temperature control, moisture management, and strategic layering—and you’ll consistently produce handheld melts that deliver a crisp exterior and satisfyingly molten interior.