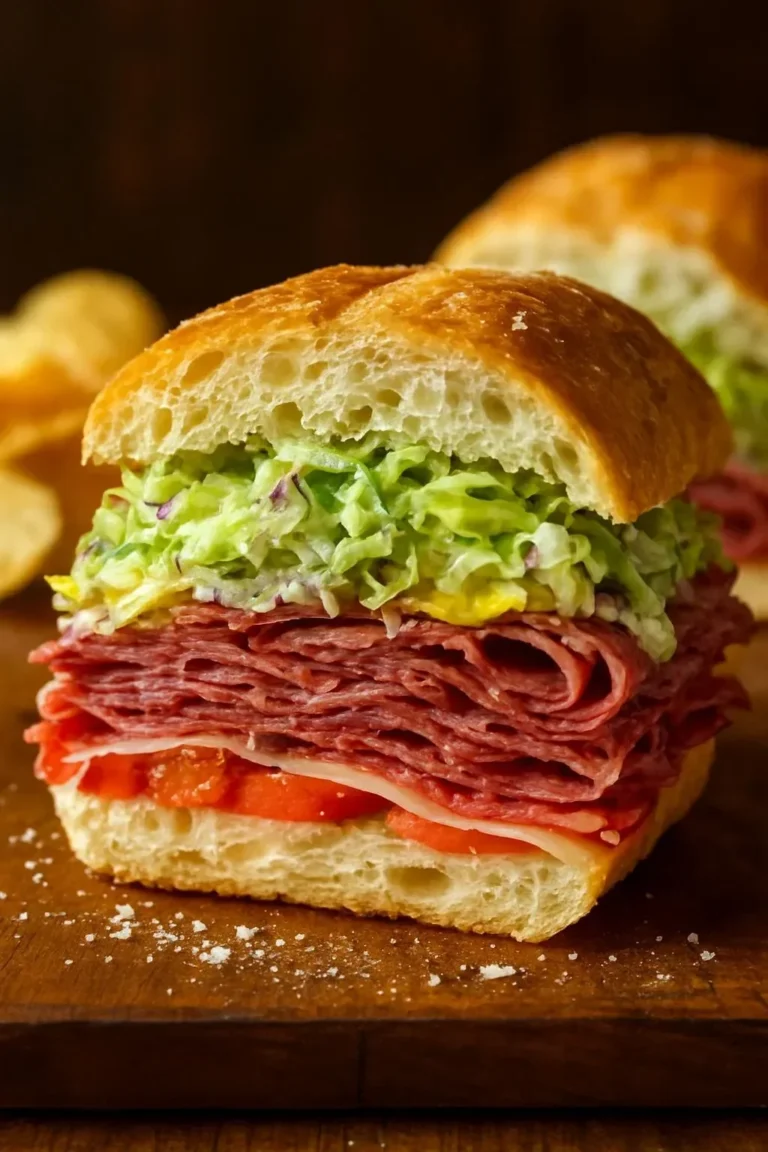

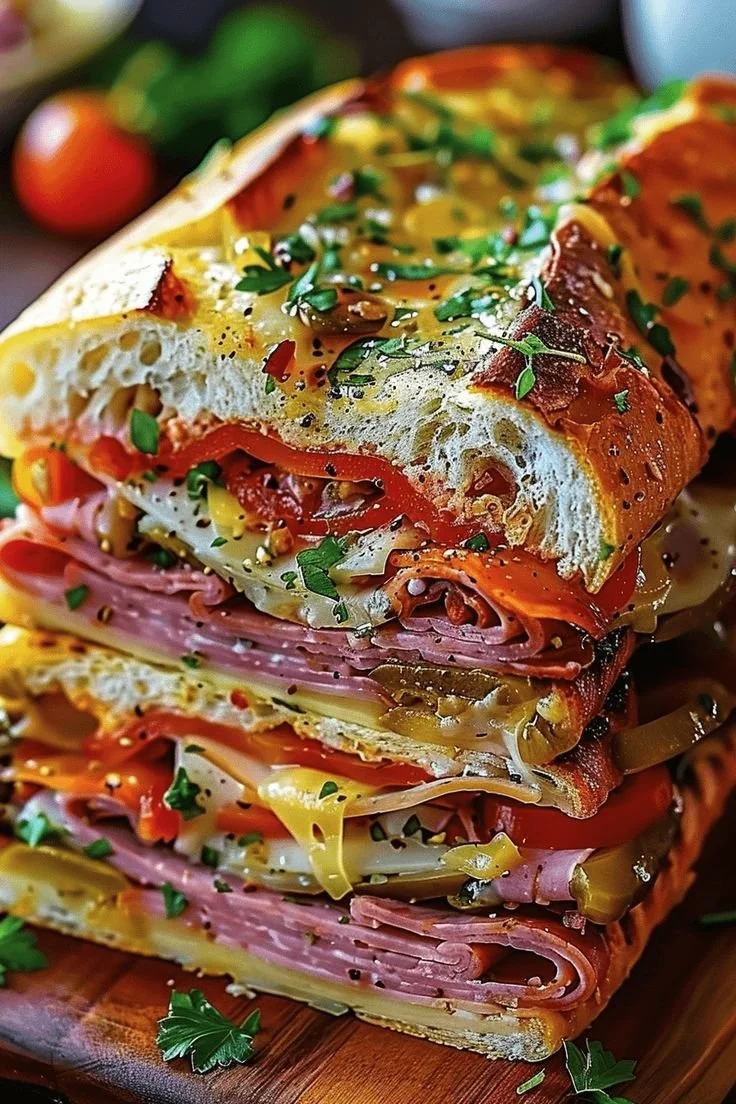
The Classic Italian Muffuletta Sandwich
A layered, bold sandwich born in New Orleans’ Italian quarter — this version focuses on the essential components: a sturdy round loaf, a finely tuned olive salad, and the right selection of cured meats and cheeses to balance salt, fat, and acid. Below you’ll find a thorough breakdown of ingredients, equipment, step-by-step assembly, storage, variations, and troubleshooting so you can reproduce an authentic muffuletta at home and adapt it to your tastes. For a full Italian-inspired meal, serve it with an authentic Italian spaghetti sauce recipe alongside a crisp salad.

How this recipe differs from deli shortcuts
- Focuses on house-made olive salad to get the bright acidity and texture that store-bought jars often lack.
- Uses a round, sesame-seeded loaf for the classic crush-and-press eating experience.
- Balances the oiliness of meats with a mix of tangy pickles, citrus, and herbs in the olive mix.
Ingredients (with notes)
- Round sesame loaf (10–12 inches), or Italian bread shaped into a boule: choose a loaf with a firm crust and a soft but not overly airy crumb so it holds up to wet ingredients.
- Olive salad (see separate ingredient list below): the sandwich’s flavor hinge — must be finely chopped, marinated, and well-drained.
- Cured meats:
- Genoa salami, thinly sliced — provides spice and fat.
- Mortadella, thin-sliced — brings smooth texture and mild flavor.
- Capicola or prosciutto cotto — adds savory depth.
- Cheeses:
- Provolone sliced thin, or a mix of provolone and Swiss for balance.
- Optional: sliced tomatoes, shredded lettuce — if used, add sparingly to avoid sogginess.
- Butter or softened olive oil for toasting the bread.
Olive salad (yields about 2 cups)
- 1 cup mixed green and black olives (pitted)
- 1/2 cup pepperoncini or pickled peppers, seeded
- 1/4 cup roasted red peppers
- 1/4 cup finely diced celery
- 2 tbsp capers, drained
- 1 small shallot or 2 tbsp red onion, minced
- 2 tbsp red wine vinegar
- 4 tbsp extra-virgin olive oil
- 1 tsp dried oregano, pinch of crushed red pepper
- Salt and freshly ground black pepper to taste
Notes on olive salad components
- Use pitted olives for easier chopping and better texture. A mix of Castelvetrano and Kalamata works well.
- Pepperoncini add acidity and slight heat; adjust quantity to taste.
- Let the salad sit at least 30 minutes for flavors to meld; overnight is better for deeper complexity.
Equipment needed
- Large chef’s knife and cutting board for fine chopping.
- Food processor (optional) to pulse the olive salad for a finer texture, but be careful not to purée.
- Sharp bread knife for clean slicing of the round loaf.
- Rimmed baking sheet or panini press for warming and pressing.
- Plastic wrap or parchment for pressing the sandwich.
Step-by-step instructions
- Prepare the olive salad: coarsely chop olives, roasted peppers, pepperoncini, capers, celery, and shallot. Toss with vinegar, oil, oregano, and pepper. Taste and adjust salt only sparingly — olives are salty. Let sit at room temperature for 30 minutes or refrigerate overnight.
- Slice the loaf horizontally into two even rounds. Hollow out a shallow portion of the crumb from each half if the loaf is very soft; this creates room for fillings and prevents the bread from bursting.
- Lightly toast the cut sides of the loaf under a broiler or in a skillet until just golden. This creates a moisture barrier and adds flavor.
- Spread a thin layer of olive oil or softened butter on the outer cut surfaces to help crisp during pressing.
- On the bottom half, distribute a generous layer of the olive salad — about 3/4 to 1 cup depending on bread size — spreading evenly to the edges.
- Layer meats in sequence: salami, mortadella, capicola (or prosciutto). Arrange slices so they overlap and cover the olive salad without piling too high; the sandwich should be firm enough to compress.
- Add cheese slices over the meats.
- Replace top half of the loaf and press gently by hand. For a more authentic, compact sandwich, wrap the entire sandwich tightly in plastic wrap and place a heavy skillet or two on top for 20–30 minutes.
- Warm the wrapped, pressed sandwich briefly in an oven preheated to 350°F for 10 minutes if you prefer the cheese to meld; keep wrapped to retain shape.
- Unwrap and cut into wedges using a serrated knife. Serve immediately.
Pro tips for authentic texture and flavor
- Finely chop the olive salad rather than leaving large pieces; it should incorporate into the sandwich instead of spilling out.
- Don’t overload with oil; the olive salad’s oil binds flavors but too much will make the bread soggy.
- Let the sandwich rest under weight: pressing compresses air pockets and helps the olive-salty mixture penetrate the surrounding meat and bread.
- If you must use store-bought olive salad, redistribute and drain it on a paper towel, then freshen with lemon juice and extra herbs before using.
- Slice cold or room-temperature sandwich cleanly to avoid squashing; a warmed sandwich should be slightly cooled after pressing before slicing.
Storage and reheating
- For best texture, wrap individual wedges tightly in parchment then plastic and refrigerate for up to 3 days.
- To reheat, unwrap and warm in a 350°F oven for 8–12 minutes, flipping once, until the cheese softens and the bread regains crispness.
- Toasting directly in a panini press works well for single servings but avoid microwaving — it ruins the crunch and makes the olive salad oily.
Pairings and serving suggestions
- A crisp, acidic salad (arugula with lemon vinaigrette) cuts through the sandwich’s richness.
- For a heartier Italian table, serve with braised or roasted meats; a traditional pairing idea is to include authentic Italian braciole as a complementary main.
- Beers with hoppy bitterness and medium-bodied red wines with bright acidity are classic counters to the salty, fatty flavors.
Common variations and how to adapt them
- Vegetarian: replace meats with grilled eggplant, roasted red peppers, and marinated artichokes; add a generous olive salad to preserve the core flavor profile.
- Spicy: add hot soppressata or extra pepperoncini; include crushed red pepper in the olive salad to build heat throughout.
- Mini muffulettas: use small rolls and scale down olive salad and meats for party platters. Consider assembling in advance and pressing lightly to speed service.
- Low-sodium: rinse jarred olives and capers, and reduce added salt in the olive salad; emphasize acidic components (vinegar, lemon) to compensate for reduced saltiness.
Common mistakes and how to avoid them
- Using a soft, flimsy bread: leads to collapse and soggy texture. Choose a dense round loaf with a good crust.
- Over-oiling the olive salad: excess oil pools and saturates the bread. Drain the salad on paper towels if it looks oily.
- Skipping the press: without weight, the sandwich falls apart and doesn’t develop the intended mouthfeel.
- Assembling far in advance without pressing: the flavors may not meld properly; if making ahead, assemble, press, and refrigerate wrapped to allow integration.
- Adding too many wet toppings (tomato, lettuce): if including, pat dry tomatoes and add lettuce just before serving.
Frequently asked questions
- How long does the olive salad keep?
- Kept refrigerated in a sealed jar, it will be flavorful for up to two weeks; the acidity preserves it, but flavors mellow over time.
- Can I use other breads?
- A sturdy Italian or French loaf can substitute, but a round sesame loaf is traditional for structure and sesame flavor.
- Is it necessary to press the sandwich?
- Pressing is essential for texture and for the tastes to marry; a quick hand-press helps, but a wrapped, weighted rest is ideal.
- Can it be frozen?
- Freezing a fully assembled muffuletta is possible but not recommended due to texture changes in olives and bread. Freeze components separately for best results.
- What’s the ideal meat-to-cheese ratio?
- Aim for about 1:1 by volume of meat to cheese so neither dominates and the olive salad remains the flavor bridge.
Nutrition and portioning guidance
- The sandwich is rich and calorie-dense; plan servings as half or quarter wedges depending on appetite and sides.
- Balancing with acidic, vegetable-forward sides reduces perceived heaviness and provides nutritional variety.
Final assembly checklist before serving
- Bread toasted lightly and hollowed if needed
- Olive salad drained and evenly distributed
- Meats layered so flavors intermix, not piled too high
- Cheese covers meats to bind the layers
- Sandwich tightly pressed and rested, then sliced cleanly
Enjoy the precise balance of savory meats, creamy cheese, and vibrant olive salad that defines this regional classic. With attention to bread choice, olive salad texture, and proper pressing, you’ll reproduce the authentic bite and structure every time.