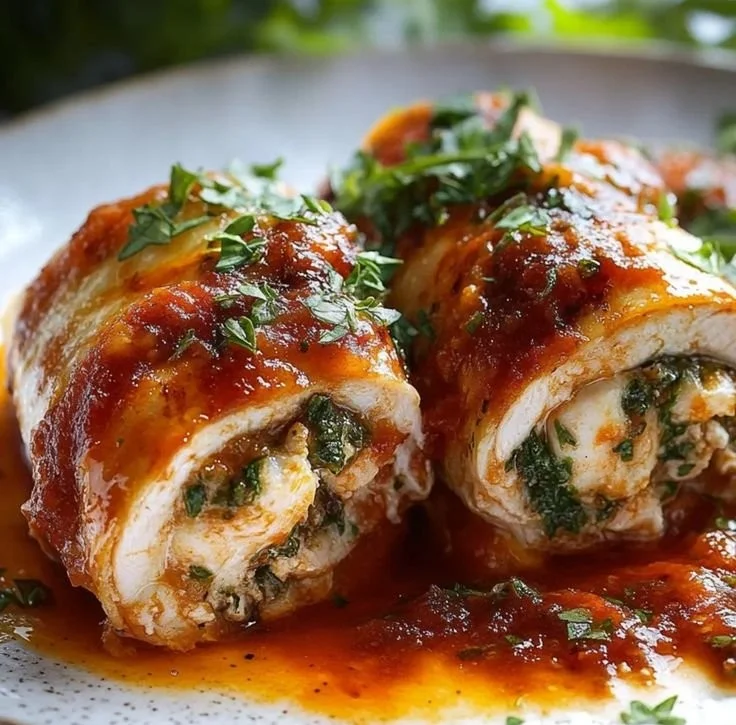

3 Ingredient Italian Chicken Recipe
Why this ultra-simple Italian chicken works
This recipe shows how to turn a minimal ingredient list into a flavorful, weeknight-ready main that still tastes intentionally Italian. Using just a protein, a pantry-friendly binder, and a bright, herb-forward component creates layers of texture and flavor without long prep. If you appreciate authentic sauce flavors alongside speedy cooking, check this 130-year-old authentic Italian spaghetti sauce recipe for inspiration on pairing and seasoning profiles.
Ingredients and notes
- 4 boneless, skinless chicken breasts (6–8 ounces each) — even thickness for even cooking
- 1 cup marinara or crushed tomatoes — choose a good-quality, herb-forward jar or homemade for best flavor
- 1 cup shredded mozzarella or provolone cheese — melts well and gives the dish a creamy finish
Notes:
- Chicken: Thinner cutlets cook faster and stay tender. If using thick breasts, slice them horizontally into cutlets or pound to ½ inch.
- Tomato component: A chunky crushed tomato gives more texture; a smooth marinara creates a saucier final result. If sodium is a concern, pick a low-sodium jar and taste before adding salt.
- Cheese: Freshly shredded cheese melts more smoothly than pre-shredded (which often contains anti-caking agents).
Equipment you’ll need
- Heavy skillet (10–12 inches) that’s oven-safe, or a skillet plus a small baking dish
- Sharp knife and cutting board
- Meat mallet or rolling pin (for pounding cutlets)
- Instant-read thermometer (optional but useful)
- Tongs and silicone spatula
Using an oven-safe skillet lets you finish the dish under the broiler for a browned cheese top without transferring to another dish.
Step-by-step cooking instructions
- Prep the chicken:
- Pat breasts dry and season lightly with salt and pepper. If thickness varies, pound to ½ inch between plastic wrap or slice into cutlets.
- Sear:
- Heat 1 tablespoon olive oil over medium-high until shimmering. Sear chicken 2–3 minutes per side until golden but not fully cooked; internal temp should be ~125–130°F. Remove and set aside.
- Add tomato:
- Reduce heat to medium. Pour the cup of marinara or crushed tomatoes into the pan, scraping up brown bits. Simmer 2–3 minutes to warm and concentrate.
- Assemble:
- Nestle the seared chicken back into the tomato, spooning sauce over each piece.
- Top with cheese:
- Evenly divide shredded cheese over the chicken.
- Finish cooking:
- For a skillet: transfer to a preheated 375°F oven for 8–12 minutes until chicken reaches 165°F and cheese is bubbly; or place under a broiler 1–2 minutes to brown. For stovetop-only: cover and simmer gently 6–10 minutes, checking temp.
- Rest briefly:
- Let rest 3–5 minutes before serving to allow juices to redistribute.
Timing notes: From sear to the table this method is typically 20–30 minutes, depending on chicken thickness.
Pro tips for restaurant-style results
- Even thickness is everything: pounding cutlets ensures uniform cook time and a tender bite.
- Dry before searing: a dry surface browns better. Pat with paper towels.
- Don’t over-salt the sauce: many jarred sauces already contain salt; taste and adjust after heating.
- Use medium-high heat to develop color quickly, then finish gently. Browning adds flavor without overcooking the interior.
- Cheese distribution: press the cheese slightly into the sauce so it melts into the edges rather than sliding off.
- Rest before slicing: gives a juicier final texture and cleaner presentation.
Storage and reheating
- Refrigerator: Store cooled leftovers in an airtight container for 3–4 days.
- Freezing: Freeze individual portions flat in freezer-safe containers or wrap tightly in foil and place in a resealable bag for up to 2 months. Thaw overnight in the fridge before reheating.
- Reheating: Oven method (best): 350°F covered for 15–20 minutes until warmed through. Stovetop: gently reheat in a covered skillet over low heat to avoid drying. Microwave: use short intervals and cover to retain moisture, but expect a softer texture.
Label containers with date and number of portions for easy meal planning.
Serving suggestions and pairings
This dish pairs well with simple, complementary sides that soak up the tomato and cheese.
- Quick greens: A peppery arugula salad dressed in lemon and olive oil cuts richness.
- Pasta: Tossed spaghetti or penne works, but keep portions modest so the chicken remains the star.
- Vegetables: Roasted asparagus or sautéed spinach add color and texture.
For a light, refreshing finish that balances the savory main, a chilled fruit-based drink works well; for an ultra-quick complement, try a 2-minute 2-ingredient frozen fruit smoothie as an easy palate cleanser.
Variations and flavor twists
- Herb-forward: Fold chopped fresh basil or oregano into the warmed tomato before adding the chicken for brighter, fresher notes.
- Lemon-garlic: Add 1 teaspoon lemon zest and a minced garlic clove to the sauce for a citrusy lift.
- Panko crust: Before searing, brush cutlets lightly with olive oil and press panko crumbs into the exterior for a crisp crust; finish with cheese as directed.
- Prosciutto or pancetta: Drape a thin slice of prosciutto over each cutlet under the cheese for a savory, slightly salty finish.
- Dairy-free: Swap cheese for a sprinkle of nutritional yeast or a dairy-free melter; increase herbs and a tiny splash of balsamic to round the flavor.
These variations keep the ingredient count low while offering distinct serving options.
Common mistakes and how to avoid them
- Overcooking the chicken: Use an instant-read thermometer and remove at 160°F; carryover heat will bring it to 165°F while resting.
- Skipping the sear: Directly baking chicken in sauce leads to a pale, less flavorful result. A quick sear creates Maillard flavor.
- Using too much sauce: Excess sauce dilutes texture and may prevent cheese from browning. Stick close to the recommended amount or simmer longer to thicken.
- Crowding the pan: Overcrowding lowers pan temperature and prevents browning. Sear in batches if needed.
- Adding cheese too early: Cheese added while sauce is still boiling can split or slide off. Add after the sauce is warmed and just before finishing heat.
Addressing these points will greatly improve consistency and flavor.
Frequently asked questions
Q: Can I use bone-in chicken?
A: Yes, but adjust cooking time; bone-in pieces will take longer to reach safe internal temperature. Sear skin-side first and finish in the oven until the thickest part reaches 165°F.
Q: Is this suitable for meal prep?
A: Absolutely. Prepare, cool, and portion into airtight containers for ready-to-heat weekday meals. Reheat gently to preserve texture.
Q: Can I make it with chicken thighs?
A: Boneless thighs work well and tolerate longer cooking without drying. Follow the same sear-and-finish method, monitoring internal temperature.
Q: What if I don’t have an oven-safe pan?
A: Transfer seared chicken and sauce to a baking dish, top with cheese, and bake. Alternatively, cover and simmer on the stovetop until cooked through; then briefly broil in an oven-safe pan after transferring.
Q: How do I make the sauce thicker?
A: Simmer uncovered for a few minutes to reduce, or stir in a teaspoon of tomato paste to deepen flavor and thicken slightly.
Q: Can this be made gluten-free?
A: Yes—use naturally gluten-free ingredients and avoid panko or crumb coatings. Most jarred tomato sauces are gluten-free, but always check labels.
Nutrition and portioning tips
- Portion control: A standard 6-ounce cooked breast with the sauce and cheese makes a satisfying entree portion for most adults.
- Lighten it up: Use a reduced-fat mozzarella and a low-sodium tomato sauce; serve with a large green salad to increase fiber without many extra calories.
- Protein swap: The method works with turkey cutlets or firm fish fillets if adapted for shorter cooking times.
Use balanced plating—protein, vegetables, and a modest starch—to keep meals nutritious and satisfying.